Article: How to Make Wax Seals
How to Make Wax Seals
How to make Wax Seals: A modern guide for Beginners
Wax seals add a timeless elegance to invitations, letters, and gifts. Whether you're crafting wedding stationery or personalising correspondence, creating your own wax seals is both enjoyable and rewarding. This guide walks you through the process, offering practical tips to ensure beautiful results every time.

What you'll need
-
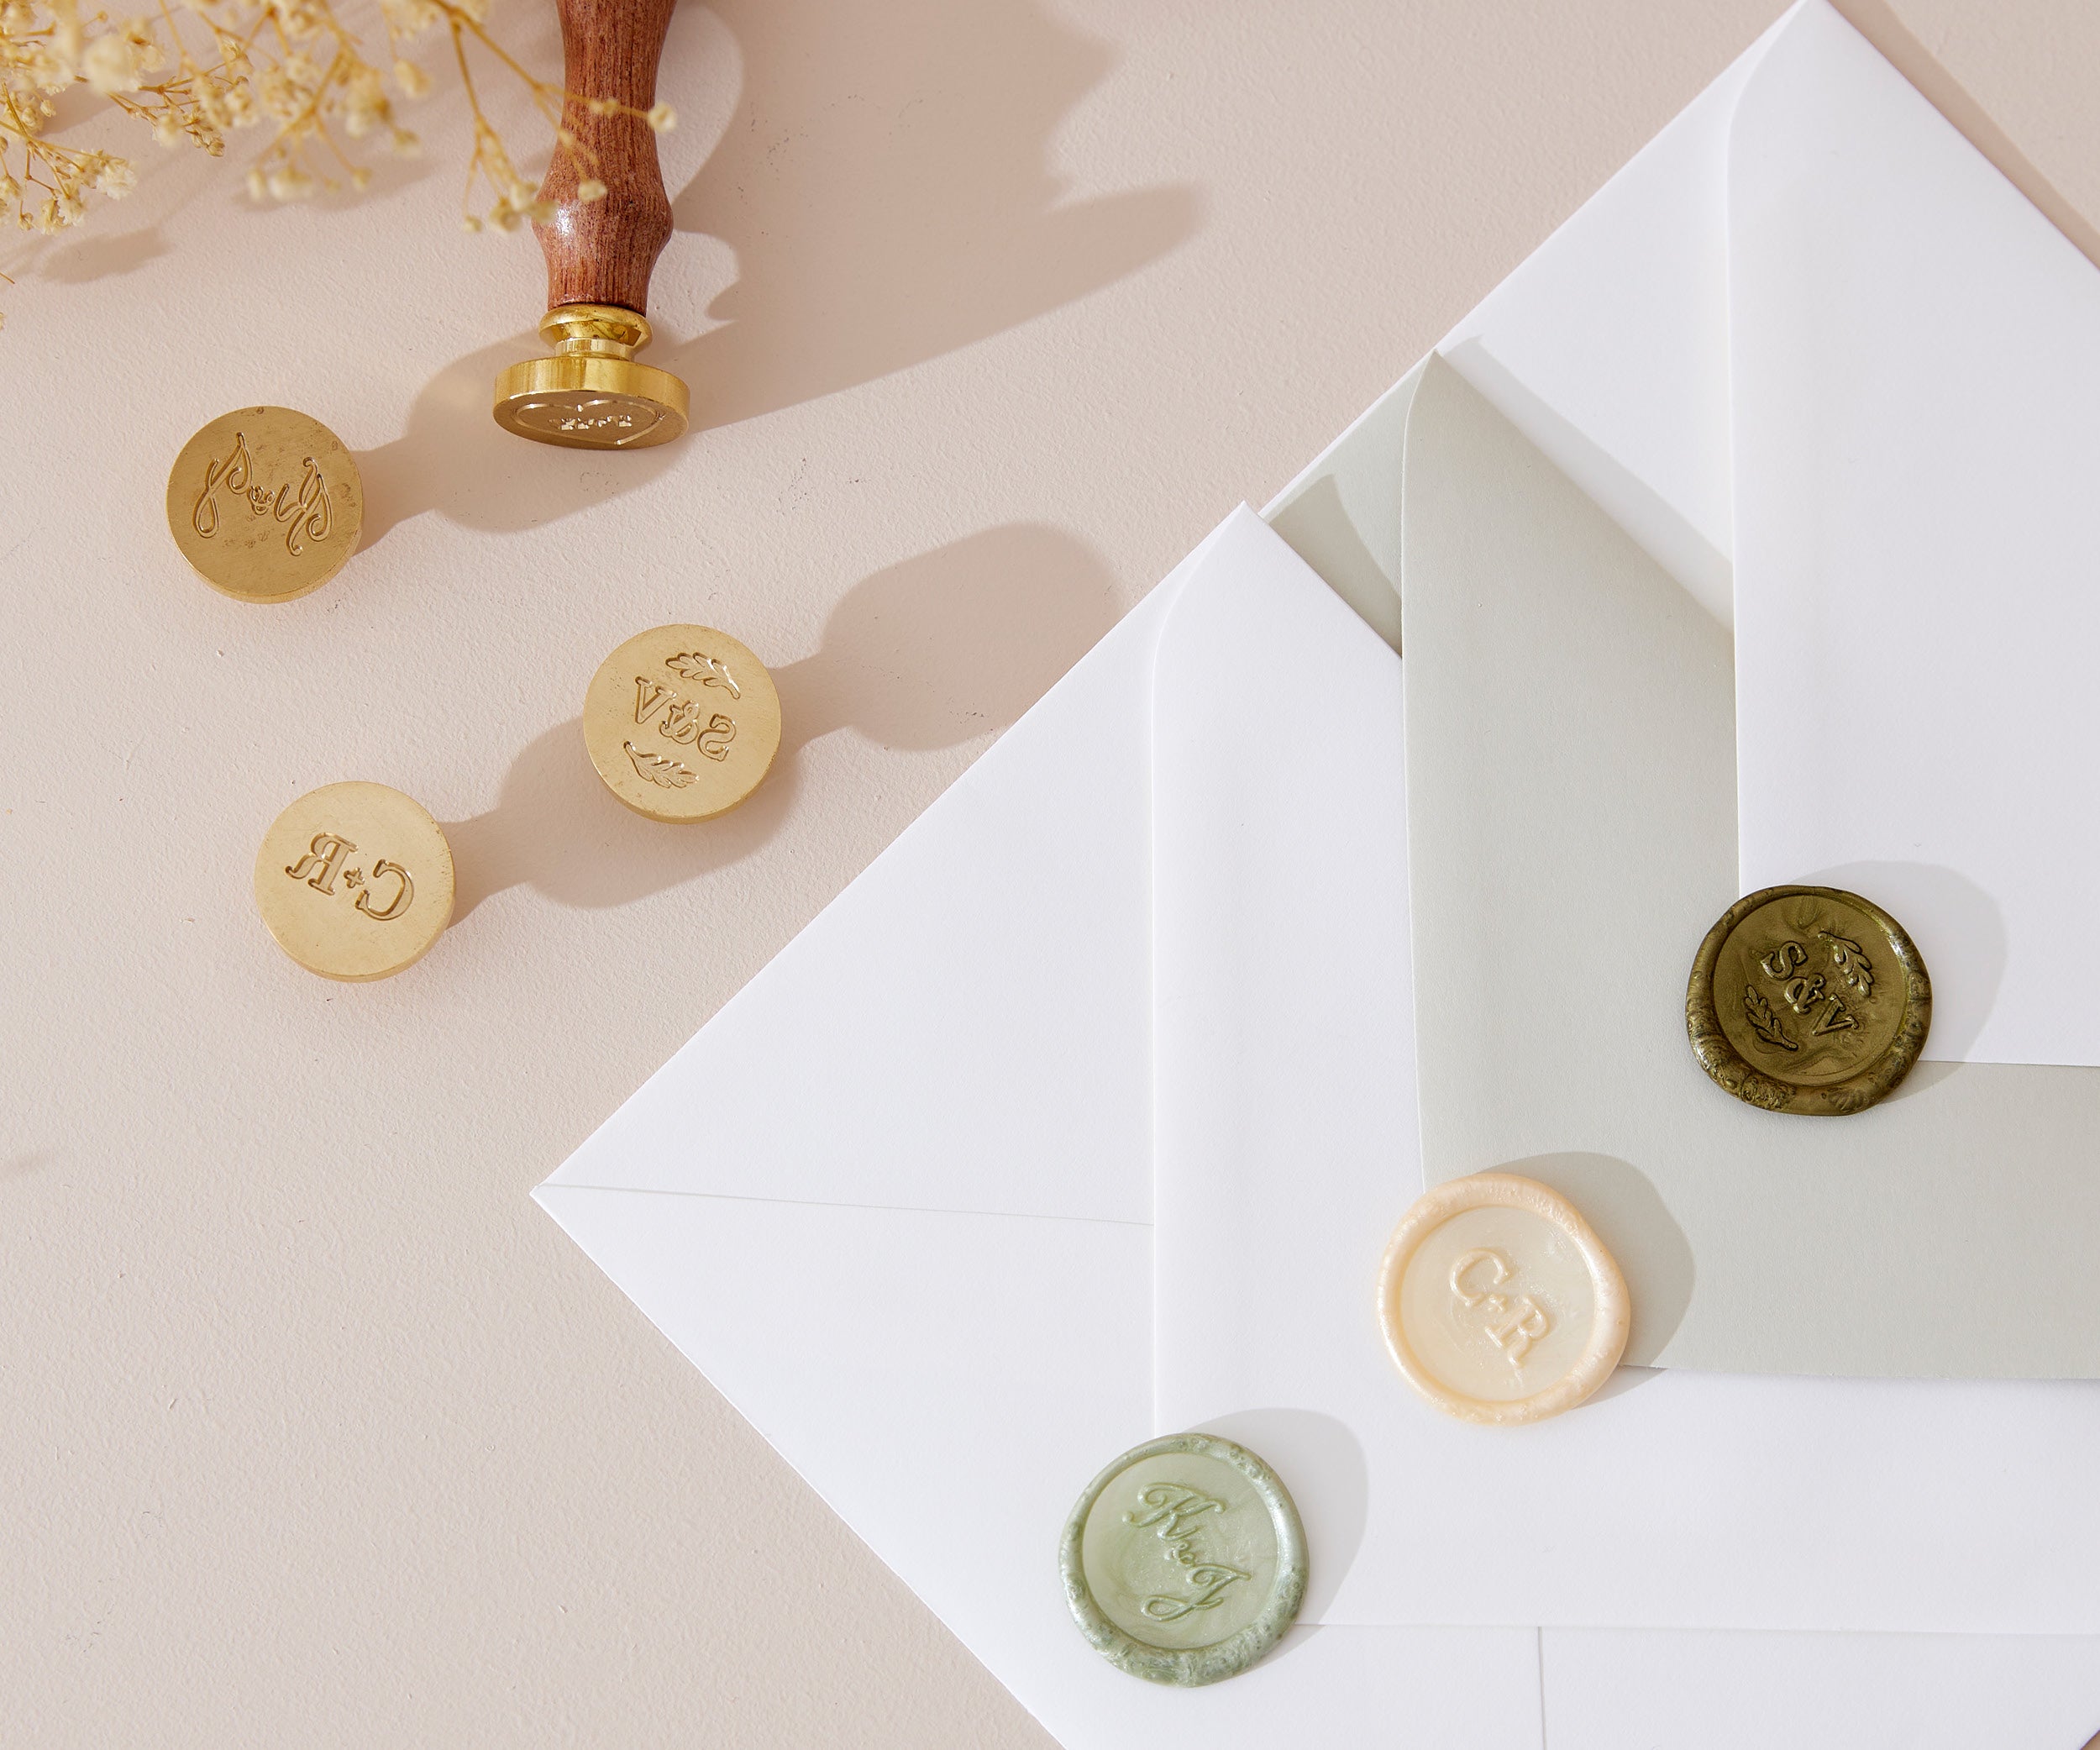
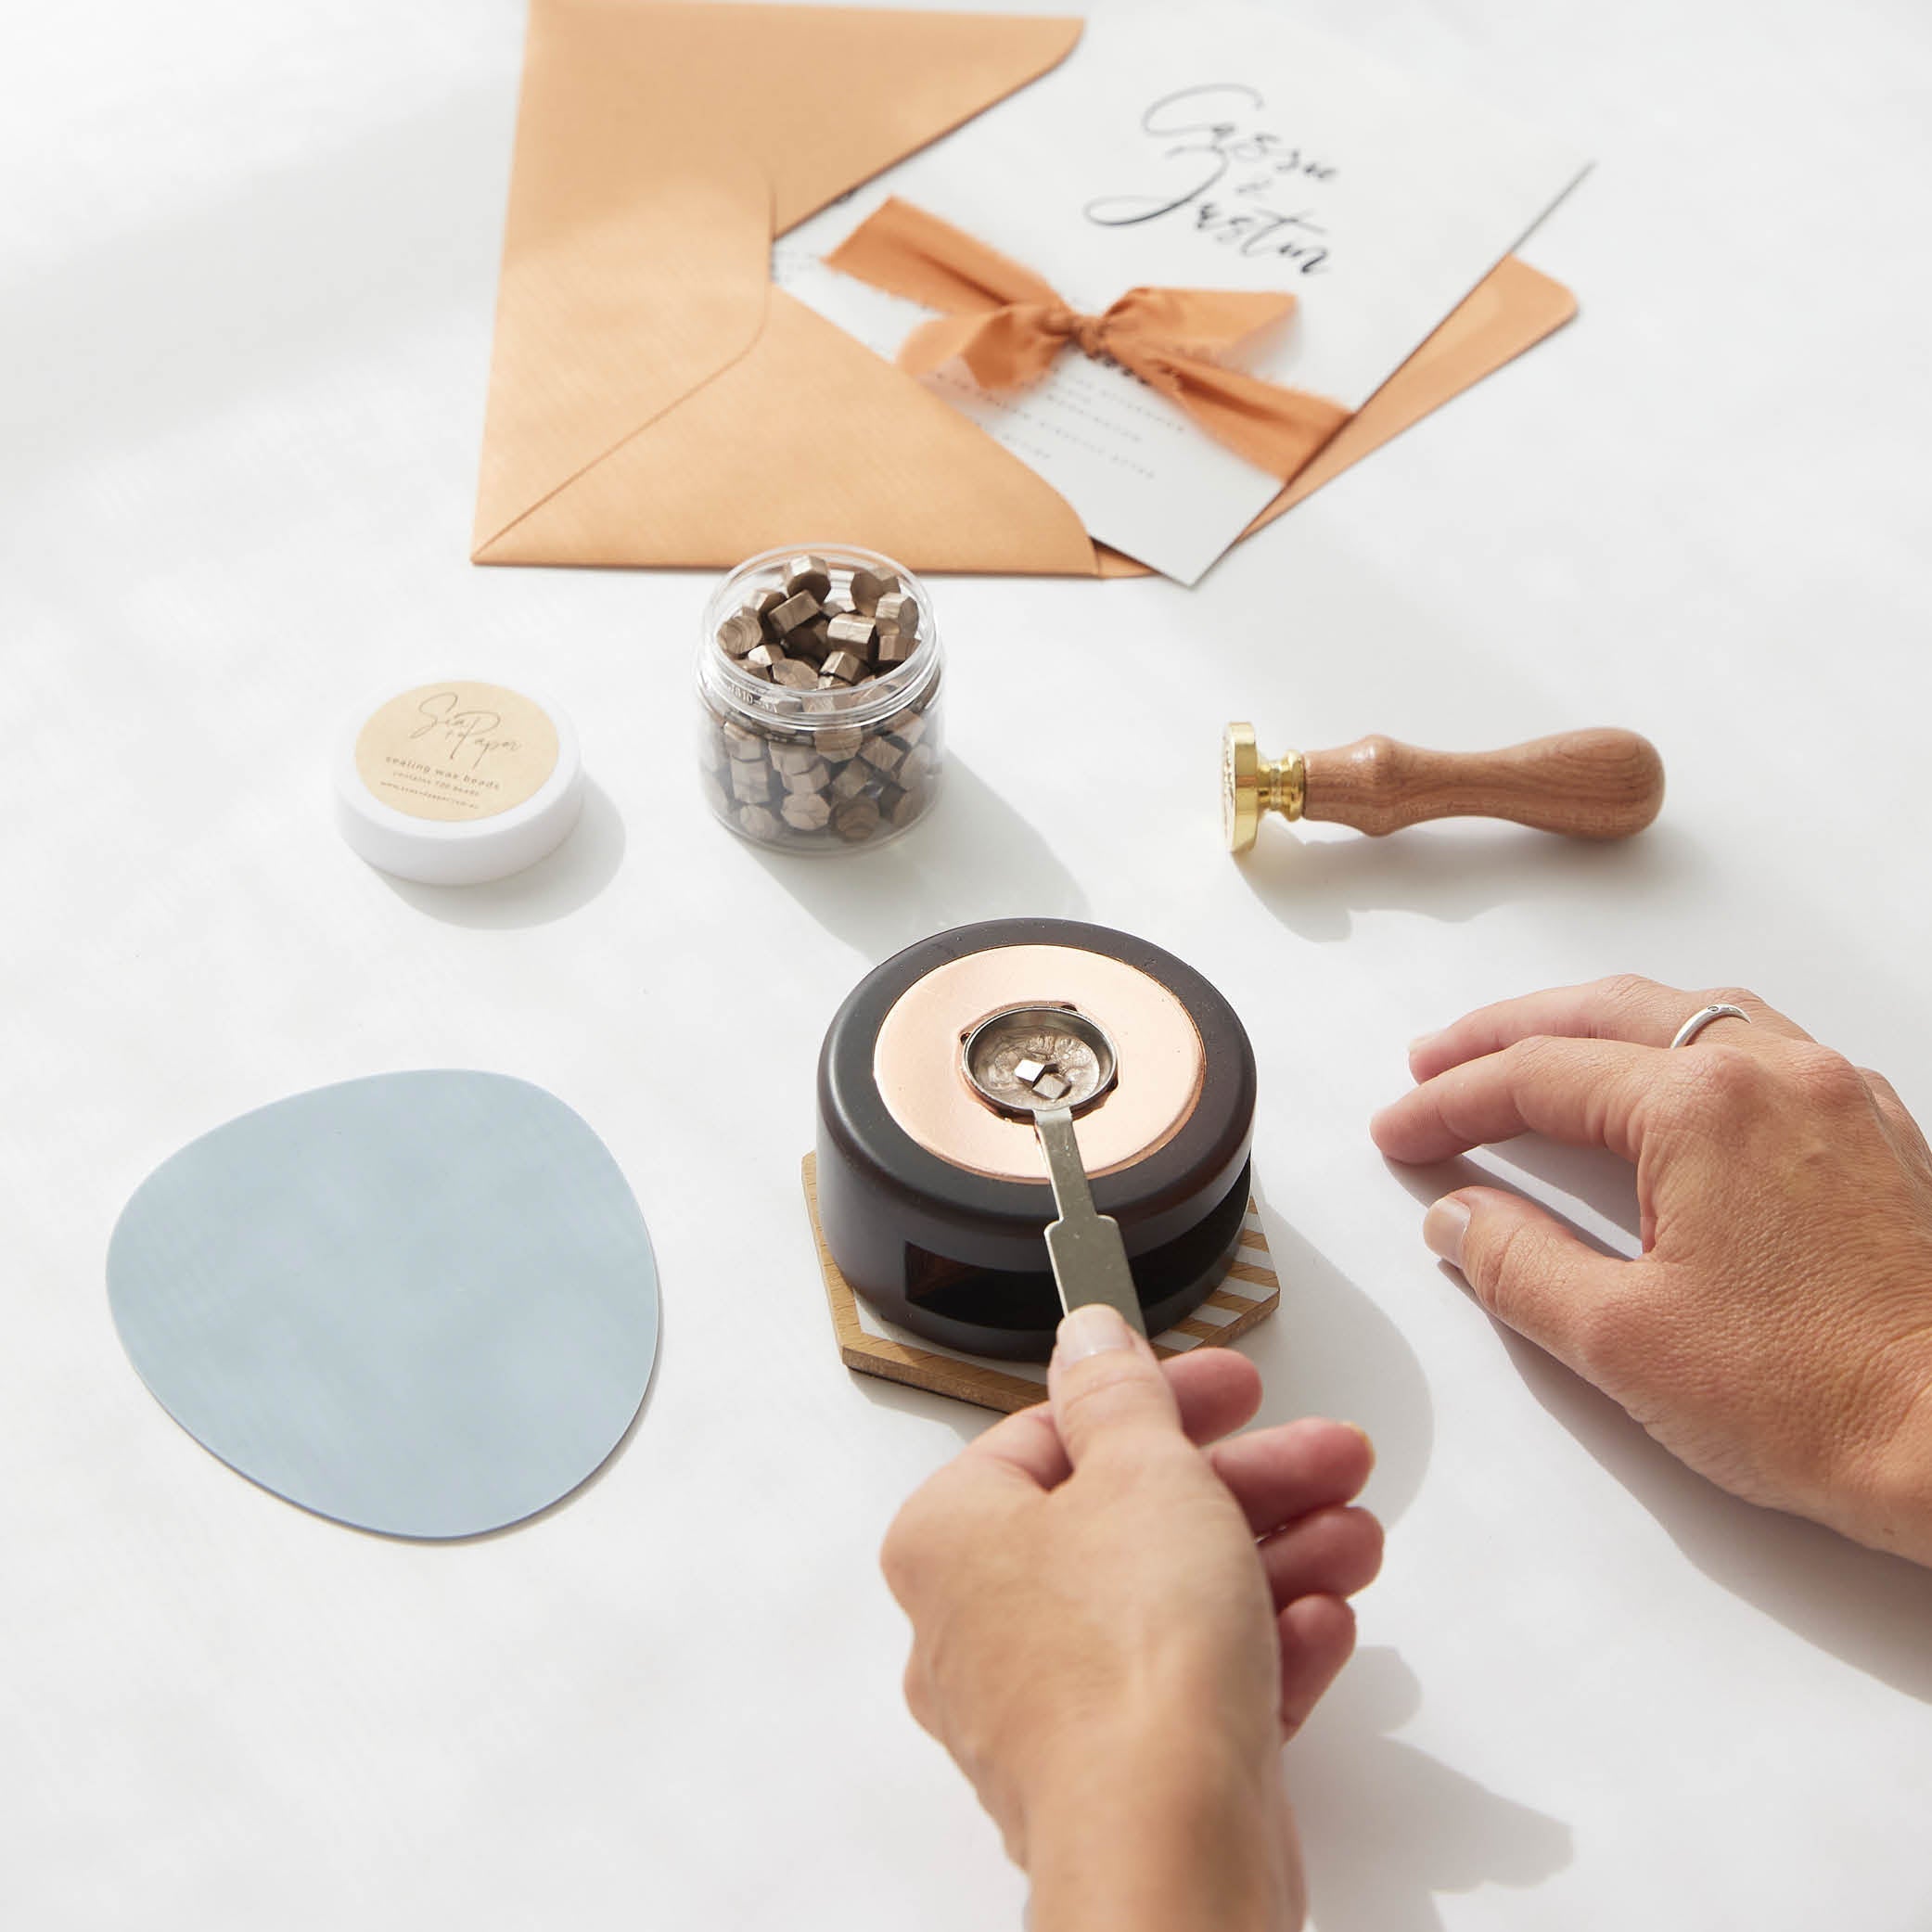
Wax Seal Stamp: Choose a design that reflects your style - whether it is a monogram design, floral motif, or custom logo.
-
Sealing Wax: Available in Sealing Wax Beads and Sealing Wax Sticks. This guide will explain the best way to make Wax Seals using Sealing Wax Beads.
-
Melting Spoon, Burner & Tealight Candle: Use a wax melting spoon with a tealight candle, a Wax Burner for ease.
-
Wax Seal Makers Mat: The perfect tool for practicing your wax seals and for making pre-made wax seals
-
Optional Embellishments: Dried flowers, Foil, or Glitter can add a unique touch to your seals.
Make it easy with a Wax Seal Beginner Kit which includes everything you need (minus the tealight candle. We LOVE the Ikea tealight candles!)
Step by Step process
Step One: Set up a clean, heatproof workspace that is away from any flammable items as you will be using a tea light candle.
Step Two: Light your tea light candle and place the Wax Melt Burner over the top
Step Three: Add 3 wax beads to your melting spoon and rest on your Wax Melt Burner

Step Four: Wait for the Wax Beads to melt to the consistency of runny honey
Step Five: Pour the wax onto the surface your working on – either an Envelope, Card, Makers Mat etc. You want to pour to the size of a 10c piece. Aim to pour in a perfect circle.
 Step Six: Press your Wax Seal Stamp down in the centre of the wax you have just poured. Use a bit of pressure to make a clearer impression
Step Seven: Wait for the wax to cool and gently take off your Wax Seal Stamp!

Embellishments
If you’re adding Dried Petals or Foil Leaf, add them in using Fine Point Tweezers once you have poured your wax. Work quickly to avoid the wax cooling down which will impact the shape of your wax seal!

Tips for making the Perfect Wax Seals
Avoid Overheating: Overheating wax can cause bubbles and uneven seals. Melt wax slowly to achieve the consistency of runny honey. If the wax looks like water, simply take it off of the heat and allow to cool.
Practice Makes Perfect: Test your technique on a Wax Seal Makers Mat before applying seals to final projects. This helps you get a feel for the right amount of wax and pressure. If you make a wax seal you do not like, simply cut it up with scissors and put it back into your Melting Spoon to try again!
Creative uses for Wax Seals
Wedding Invitations: Add a personal touch to your stationery suite but choosing your own Custom Wax Seal Stamp, or use our Wax Seal Bridal Kit!
Letters and Envelopes: Elevate your correspondence with a classic seal

Gift Wrapping: Seal ribbons or tags for an elegant presentation. Create your own Gift Cards and Tags by using our Card & Tag Wax Seal Kit
Craft Projects: Incorporate seals into scrapbooking, journaling, or DIY decor.

Ready to start your wax sealing journey? Explore our Wax Seal Kits and Sealing Wax Beads to find the perfect tools and colors for your projects. Share your creations with us on Instagram @sea.and.paper - we'd love to see your beautiful wax seals!